Tips, Tricks and Techniques, by Rosemary Schalek
How to use the P&S Tile Cutters
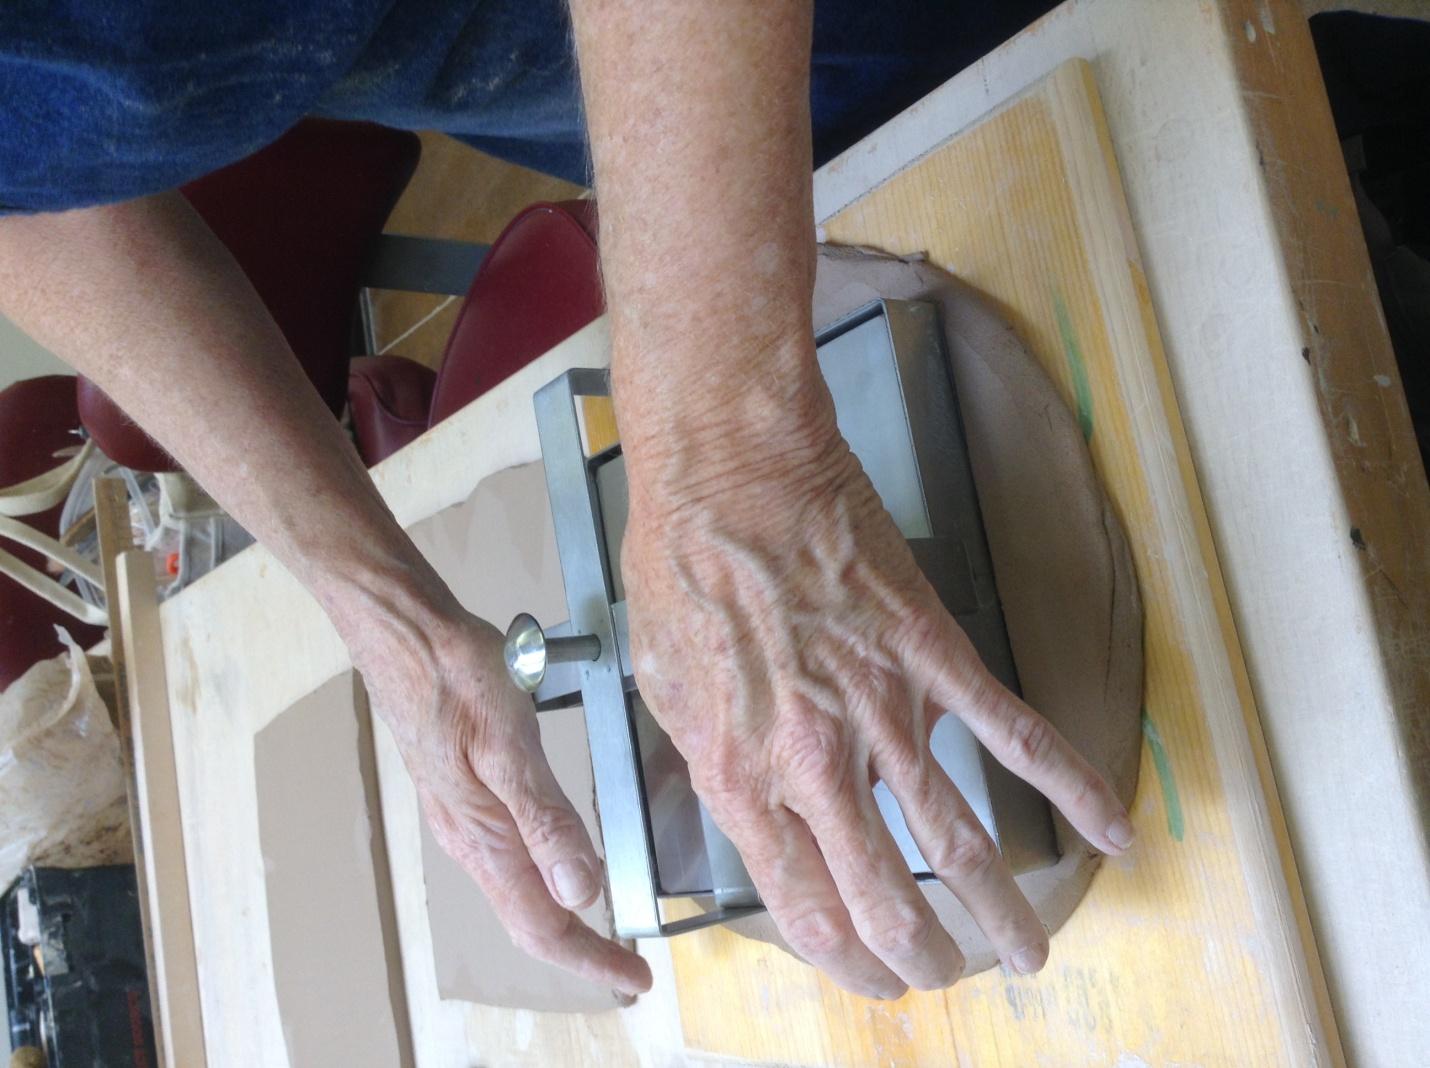
We have two tile cutters available to P&S Members. There is a cutter which yields a 4 inch square tile and a cutter which yields a 6 inch square tile.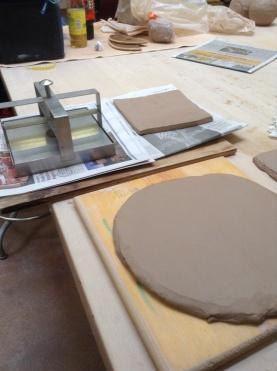
Each cutter has a spring loaded plunger/release button which pushes a release plate to eject the finished clay tile. When you review sizes, note that a given size (i.e. 4″ x 4″) represents the finished fired dimension of the tile based on a 12% shrinkage.
Rolling out the clay
You can use a rolling pin with sticks of the same thickness on each side of the rolling pin, or use the new Slab Roller available in the Studio.
Cutting the Tiles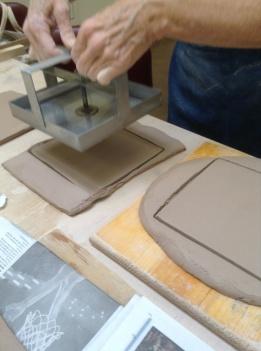
Some sources recommend that you wait until the clay is leather hard before cutting the actual tiles out, while others suggest it is okay to cut out the tiles as soon as you have your slab of clay rolled out.
If you are impressing designs, make sure you do this before cutting the tiles out, or the pressing action will deform the shape.
Drying
Slow, even drying of flat forms is very critical. You want to make sure the tiles dry evenly on both sides, or they will warp. Keep them away from drafts, and dry them slowly by covering with plastic. There are two main techniques used to dry tiles.
1. Place each tile between two pieces of drywall (also called sheetrock.) This is the stuff used to build walls. You can sandwich many tiles between layers of sheetrock and stack them up. The moisture is pulled evenly out of both sides. A variation on this is to dry between layers of three quarter inch thick plywood, or layers of calcium silicate board (often used as a non-asbestos fire proofing board).
2. Place the tiles on a wire rack to dry. This allows good air circulation. A variation on this is drying on plastic grids that are often used in fluorescent light fixtures.
Other slab and tile making tips:
Use drywall method for the first day or two, then transfer to wire racks.
Wax the edges before they dry. This prevents them from drying much faster than the center. Or wrap dry-cleaning plastic over the edges.
Grooves:
For functional tiles, people often cut grooves in the back of the tiles. This allows more surface area for adhesion; they dig into the mortar bed better. An interesting way to get the grooves is to roll the tiles out onto corrugated, grooved cardboard.
Firing Tiles
For bisque firing, you can stack tiles on top of each other, or put them into a tile setter.
Thanks to Bob Brodie and Mary Doyle for their contributions to this article.